


A Case Study for Modern Threat Hunting
Back to top

November 28, 2018
A Case Study for Modern Threat Hunting
The basics of using wire data to hunt threats
Hi, everyone! This is a general introduction for using wire data to analyze and identify active threats in the IT environment with step-by-step instructions for novice threat hunters.
The motivator for this blog is to provide very basic methodologies for investigating an active breach or attack by using the wire data collected by Network Traffic Analysis solutions. If the reader has an ExtraHop, then following along will be a breeze. If using another wire data analytics platform, the steps should remain the same with a few changes to the user interface and work flows.
Note to the reader: This is not a malware analysis or deep dive into SamSam Ransomware or any other variant. This post is intended to aid network engineers, admins, and analysts with the absolute basic steps to confirm a breach by investigating Indicators of Compromise and other behaviors associated with a security incident. It is strongly encouraged that the reader works with a 3rd party information security company to assist with any breaches or active attacks.
Without further delay, I present a number of steps on becoming a novice threat hunter by taking full advantage of wire data!
How to Become a Novice Threat Hunter
Recently, I have participated in a number of Threat Hunts to assess the movement of threat actors and malware within complex IT deployments. The severity of a breach is correlated to the time to detection and also the technical aptitude of the attackers. In this study, I will detail a number of actions taken by myself, and my clients, to assess and document serious threats to business operations.
Let's talk about visibility. In the world of modern threat actors, the more visibility your enterprise has, the better prepared you are to detect and track malware.
We can gain deep insights into the operations of our IT ecosystem by incorporating a wire data analytics platform into our daily workflows. The key messaging to take away is that having a view into the north- and south-bound traffic only gets us so far. What happens when we have been breached and need to see what is actually taking place on our network and impacting our services?
For that, wire data can help by providing visibility into the east & west corridor. Also known as the place "where hackers live."
Let's go about Threat Hunting!
There are three key areas that I emphasize for the novice threat hunter to master:
1. Know the Enemy
- Use available threat intelligence to identify suspicious traffic
- Detailed technical malware analysis blogs
2. Know the Environment
- What network infrastructure is in place?
- What server infrastructure is in place?
- What applications are in use?
3. Know Your Tools
- Practice, practice, teach, and practice more
Let's dive deeper.
Threat Hunting Step 1: Know the Enemy
The first thing every threat hunter needs is data. Information is king!
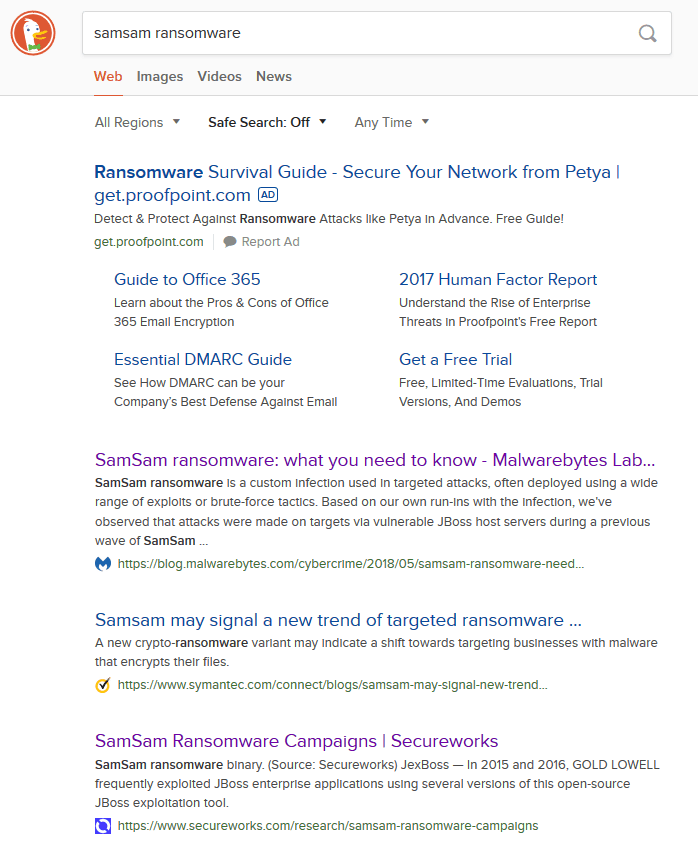
I always start a threat hunt by searching for available analysis reports and write-ups by professional information security practitioners. Over the past year, I have assisted with a few SamSam Ransomware investigations so we will use those breaches as examples for this blog post.
Below, I have captured a snapshot of search results for SamSam Ransomware. Using the data provided by these amazing technical deep dives, the novice threat hunter has plenty of ammunition to begin the investigation.
- A great breakdown of SamSam by the Threat Researchers at Sophos
- SecureWorks SamSam Analysis
Using the available threat intel on SamSam, we find the following high-level threat vector analysis of GOLD LOWELL's typical infection vectors:

- Identify scanning activity
- Identify ransomware activity
- Check for potential brute force activity by reviewing LDAP/Kerberos
- Track usage of the PSEXEC tool to escalate to Administrator privileges on Windows operating systems
- A few miscellaneous Indicators of Compromise to start the hunt
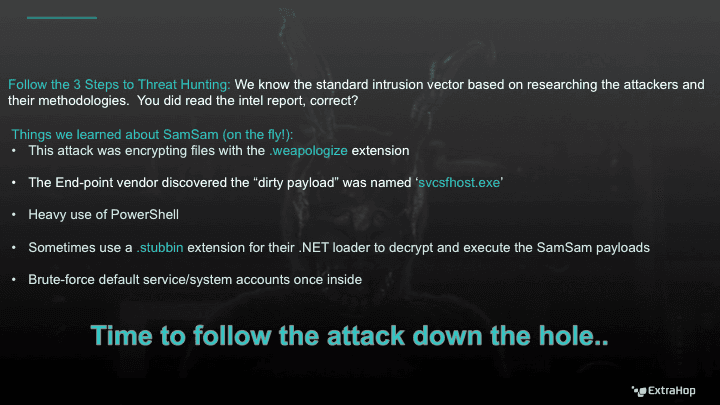
Reviewing the publicly available data, we know that the SamSam threat actors can be tracked over the network by looking for some specific indicators of compromise. Let's look at a PowerPoint slide that I prepared for these specific breaches:
Threat Hunting Step 2: Know the Environment
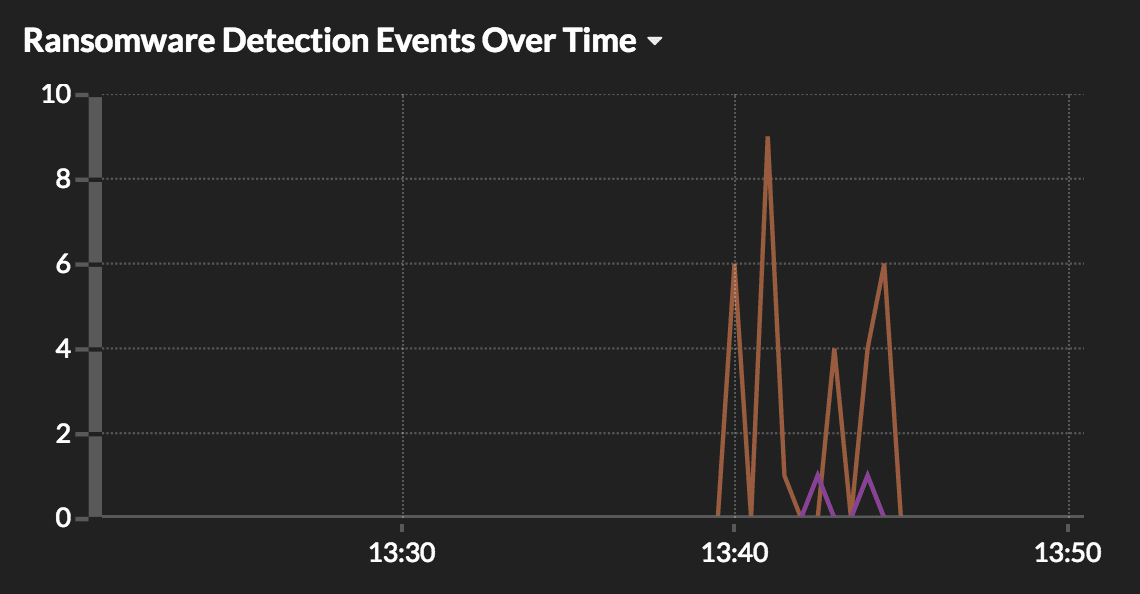
As junior threat hunters, we need to confirm that an attack is taking place. This is where we pivot to our wire data tools. Are there alarms from the end-points? How about any indicators of a breach within the East/West corridor? Below we see an example of the SamSam ransomware activity as picked up by an ExtraHop system.
Next step: let's check for reconnaissance activity inside the east/west corridor. Here we see that some scanning behaviors have been picked up by our tool. This is a good indication that something nefarious is taking place.

Again, checking our wire data tool, we now have information about the internal source and destinations for scanning activity in the environment. We use this to quickly filter or remove any known scanning servers or devices and begin narrowing down on affected devices.

Let's begin hunting for indicators of compromise specific to SamSam Ransomware. From the detailed analysis reports that we read, we now have a few IoC strings to search for:
- svcsfhost.exe
- PSEXESVC.exe
- g04inst.bat
- Test.txt
- File extensions changed to ".weapologize"
I'm going to start the hunt by searching for the various "strings" associated with the SamSam Ransomware. Using the bullet point list above, I search our wire data tool to find out which devices are compromised.
Below, we see the 'test.txt' file that is used to verify write permissions on network attached storage. We also see that the test document is originating from more than one compromised device.

Below, we analyze our wire data to search for the malware loader 'svcsfhost.exe'. This file aids in fingerprinting and loading the secondary stages of the SamSam Ransomware. (Note: this file name changes between attacks so you may need to get creative while searching if nothing comes up right away.)

Next string to search for is PSEXESVC.exe. This file originates only from a single source in this example and it is used to escalate to administrator privileges on the victim devices in order to execute the ransomware malware. Oftentimes, the network administrator may have disabled the PSEXESVC tool so searching for other alternatives is encouraged and sometimes required.

Next, we have the actual ransomware encryptor executable arrive under the resource name 'g04inst.bat'. We have seen this exact file a number of times but the threat actors behind SamSam are known for "rolling custom" malware to ensure they keep IDP and IPS systems unaware of their activities.

Our final task is to look for any files that have been encrypted with this particular ransomware. Based on the search results below, we can see that our example victim computer has been compromised and the files contained within the network attached storage have been re-written with the .weapologize extension.

Bringing It All Back Together
By knowing how to use a wire data tool to search for and confirm breaches and active attacks, the network engineer/admin/analyst is better prepared to quickly dive into an investigation by following the work flows presented here.
To summarize, to effectively begin a threat hunt (as a novice):
1. Confirm suspicious network behavior: Is there active recon/scanning behavior indicated by our tools? Do the endpoints, IDP, or wire data platforms indicate ransomware activity?
2. Learn about the attackers: Check for detailed technical malware analysis blog posts; work with the Information Security team or Consultant to identify Indicators of Compromise.
3. Identify the specific attack: Search for IoCs and strings associated with the specific malware or threat group and confirm all compromised devices using these IoC.
4. Collect and store the data: This is very important! Many breaches require forensic analysis to map the full extent of an attack. Save the data to a secure device to aid with further forensic analysis and investigation days or even weeks after the initial breach.
With these steps, I am confident that technical teams across the globe will be better positioned to aid with a threat hunt investigation.
You can check out the workflow I walked through as well as other examples of threat hunting with wire data in the online demo of our Network Traffic Analysis solution, ExtraHop Reveal(x).
Discover more


Sales Engineer
Adam is a Sales Engineer with over a decade of experience in systems engineering, network and application security compliance testing, cyber security assessment, and threat hunting.